Requirements:
Download Ubuntu 16.04 LTS ISO Image as per your system architecture using following link:Ubuntu 16.04 LTS (Xenial Xerus)
Step 1: Prepare Windows Machine for Dual-Boot
1. In case the system is installed on a single partition, you need to create some amount free space on the computer.2. Login to the administrator account of windows 7/8/8.1/10
3. On your Desktop you'll find the infamous "My Computer" icon right click on it and select the "Manage"option from the dropdown menu.

4. A new window will appear and in the lower section to the left part of the screen you will see an option called "Disk Mangement" Select it

5. Next select the drive you want to shrink. (We have taken C: drive as the partion to be shrinked)
6. Hard drive shrinking is done reduce the size of you present partition to create unallocated space that you can use elsewhere.
7. On Shrink
C: enter a value on space to shrink in MB (use at least 30000 MB depending on the C: partition size) and hit Shrink
to start partition resize.
Once the space has been resized you will see a new unallocated space on the hard drive. Leave it as default and reboot the computer in order to proceed with Ubuntu 16.04 installation.
NOTE: image shown below is just an example of shrinking a volume. In this image only 20GB has been shrinked


Step 2: Install Ubuntu 16.04 with Windows Dual-Boot
Now it’s time to install Ubuntu 16.04. Go the download link mentioned in step 1 and download the iso image based on your system architecture.Burn the image to a DVD or create a bootable USB device using Rufus.
Rufus can be found in the below link:
Download: Rufus
Insert the USB device or DVD in the appropriate drive, reboot the machine and instruct the BIOS/UEFI to boot-up from the DVD/USB by pressing a function key (usually F12, F10 or F2 depending on the vendor specifications).
Once the media boot-up a new grub screen should appear on your monitor. From the menu select Install Ubuntu and hit Enter to continue.
After everything is done loading you will end up with a fully functioning Ubuntu system in Live mode.
On the Unity Launcher hit on the second icon from top, Install Ubuntu 16.04 LTS, and the installer utility will start. Choose the language you wish to perform the installation in and click on the Continue button to proceed further.

Next, select the second option only ie: Install third party softwares from Preparing to Install Ubuntu Menu and click on Continue button again.

To select an Installation Type. You can choose to Install Ubuntu alongside Windows Boot Manager, option that will automatically take care of all the partitioning steps.
Use this option if you don’t require a personalized partition scheme. In case you want a custom partitioned layout, check the Something else option and click on Continue button to proceed further.

NOTE: The option Erase disk and install Ubuntu should be avoided on dual-boot because it will wipe out your disk.
Now we need to create our custom partition layout for Ubuntu 16.04. This guide will recommend that you create two partitions, one for ROOT and the other for HOME accounts data and no partition for SWAP (use a swap partition only if you have limited RAM resources or better yet use a fast SSD ie: if you can afford it)
To create the first partition, The ROOT partition, select the free space (Which is the shrink space from Windows we created earlier) and click on the
+ icon below. On partition settings use the following configurations and hit OK to apply changes:- Size = at least 20000 MB
- Type for the new partition = Primary
- Location for the new partition = Beginning
- Use as = EXT4 journaling file system
- Mount point = /


Now create the HOME partition using the same steps as above. Use all the available free space left for home partition size. The partition settings should look like this:
- Size = all remaining free space
- Type for the new partition = Primary
- Location for the new partition = Beginning
- Use as = EXT4 journaling file system
- Mount point = /home

Next a new pop-up window will ask you if you agree with the changes made to disk. Click on Continue to write changes to disk and the installation process will now start.
On the next screen adjust your machine physical location by selecting your current city from the map. When done click on Continue to move ahead.

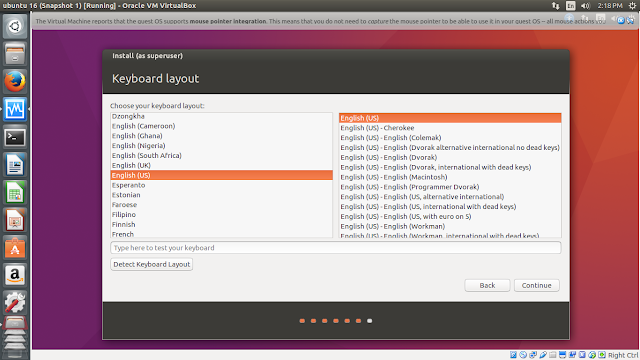
The next window will prompt you to select a keyboard layout, once done click on continue.
Now enter a a username and password for your administrative sudo account, enter a descriptive name for your computer and click Continue to finalize the installation.


These are all the required settings for customizing your Ubuntu 16.04 installation. From here on out the installation process will run automatically until it reaches the end.
The machine will reboot into the Grub menu, where for ten seconds, you will be presented to choose what OS you wish to use further: Ubuntu 16.04 or Microsoft Windows 7/8/8.1/10
Ubuntu is designated as default OS to boot from. Thus, just press Enter key or wait for those 10 seconds to pass over.
For any further queries on Installing Ubuntu 16.04 LTS please do contact us or comment your issues.
Sign up here with your email
1 comments:
Write comments[[
ReplyConversionConversion EmoticonEmoticon